What is the Difference between Photoshop Fill and Opacity?
What is the Difference between Photoshop Fill and Opacity?

Introduction:
If you go to the Layers panel in Photoshop on any picture, you’ll find both the Opacity and Fill settings for each layer. While they may appear redundant features initially, there is a significant difference.
Opacity changes the transparency of everything in the chosen layer, whereas Fill changes the transparency of whatever is filling the layer but ignores any effects applied to it.
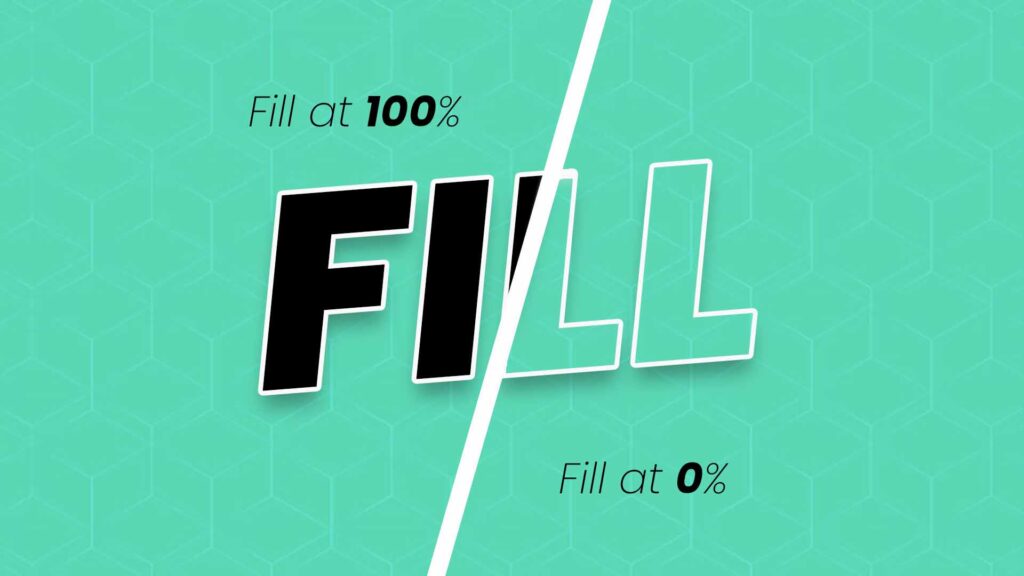
Graphic designers frequently utilize Fill to change how text effects appear. For example, if you add a stroke to a text layer and then lower the Fill to 0%, the Stroke will stay, but the original color of the text will fade away and seem transparent. If you merely used the Opacity slider, the entire layer would fade, including the Stroke.
Photoshop Opacity and Fill
Photoshop’s layer panel may adjust a layer’s Opacity and fill. Choose the layer you want to work on and adjust the Opacity and fill sliders to achieve the desired look.
The main distinction between the two is as follows:
Opacity: affects the transparency of everything in the chosen layer.
Fill: changes the transparency of whatever is filling the layer but ignores any effects applied to it. As a result, the name ‘Fill‘ was coined.
Opacity vs Photoshop Fill text examples
Photoshop Fill
Let’s say you have a text layer with a white stroke and black Fill and drop shadow effect. If you reduce the Fill of the layer to 50%, the text itself will become transparent, but the Stroke and drop shadow effects will remain fully visible.
This means the outline of the text will still have a solid blue color, and the drop shadow will be unaffected, creating a semi-transparent text with a visible stroke and shadow.
Opacity in Photoshop
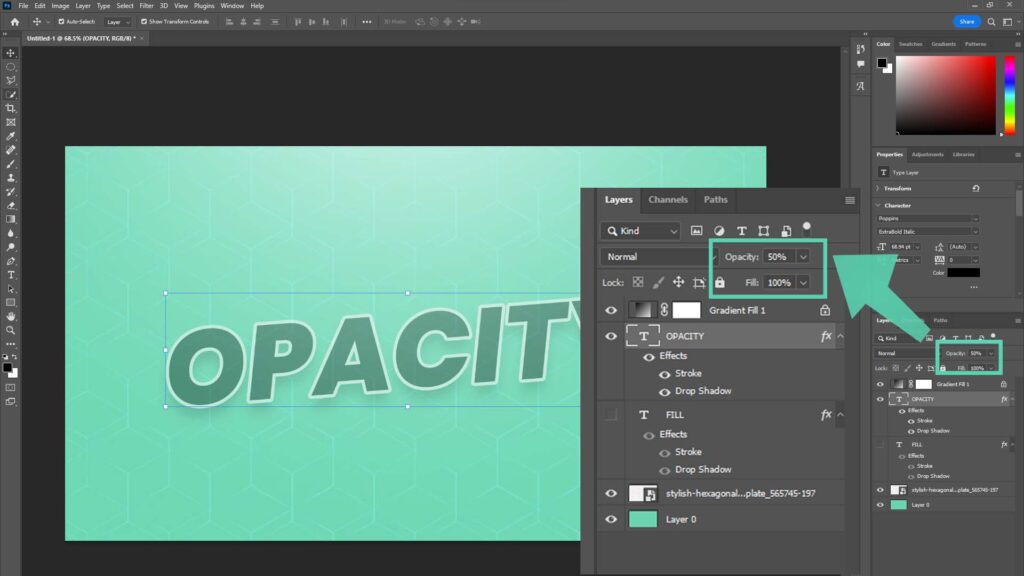
In this scenario, imagine you have the same text layer with a white stroke, black fill and a drop shadow effect. If you decrease the layer’s Opacity to 50%, the text and its effects (Stroke and drop shadow) will become semi-transparent.
This results in the text, Stroke, and drop shadow all appearing as if they are fading into the background, with reduced visibility overall.
In short, changing the Fill of a text layer affects the text’s Opacity while keeping the layer effects, like the Stroke and drop shadow, unchanged. On the other hand, changing the text layer’s Opacity impacts the text and its accompanying effects, simultaneously making them all more or less transparent.
What are layers in Photoshop?
Layers in Photoshop, which are separate pieces of information that can be stacked or rearranged to build your image composition, are one of Photoshop’s most powerful features. Layers let you draw, edit, copy, and rearrange items on one layer without affecting the others.
Opacity VS Fill

You may modify a layer’s Opacity (or transparency) using the Opacity and Fill commands. Except for one change, both instructions perform identical functions.
Observe the changes of Opacity adjustment on both the Fill and Stroke of the circles shown below. However, note that moving slider of the Fill in layer panel only affects the Fill itself and not the Stroke.
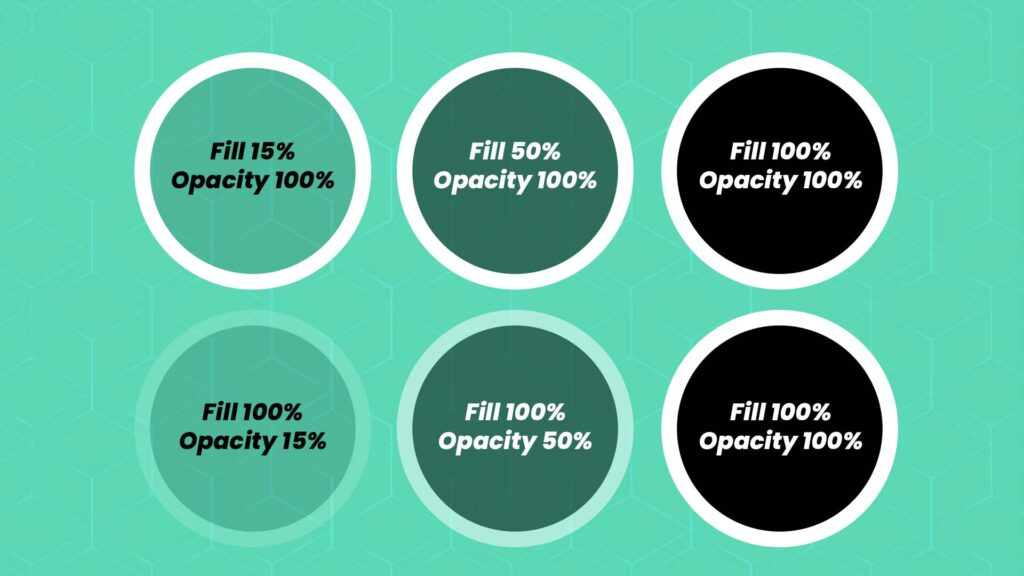
Changes to Opacity and Fill may significantly change the appearance of a layer and are advised when attempting to blend objects or make more subtle alterations.
Eight Special Blending modes
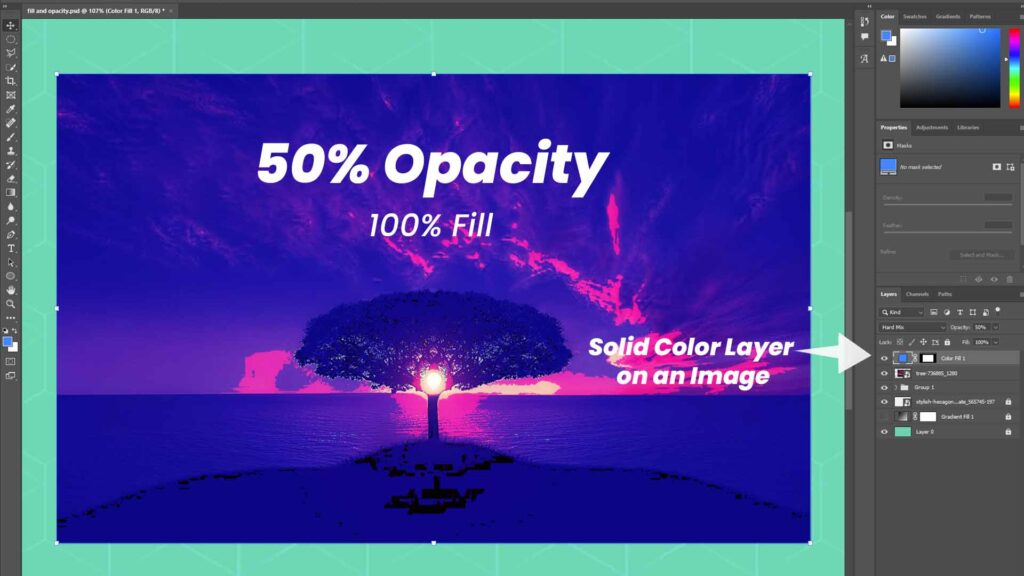
While blending modes are generally used to change opacity levels, eight unique blending modes perform best when adjusting the fill value (or percentage).
For example, when using Hard Mix (as in the attached image) to combine a base photo layer with a solid color blend layer, you can see that lowering the fill value to 50% produces a more attractive impact than lowering the Opacity to 50%.
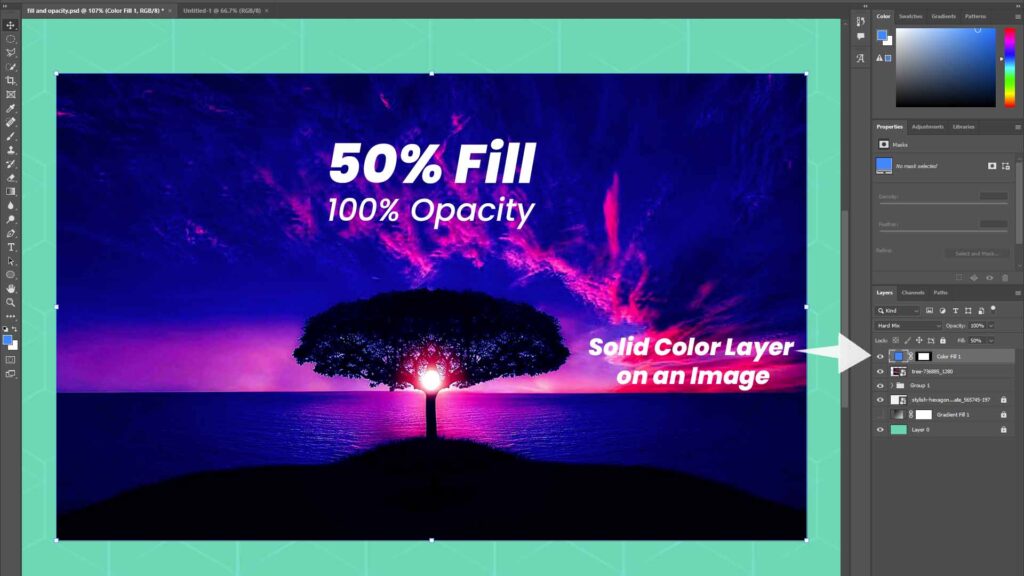
Here are the unique eight mixing modes, or we can say special blend modes are
- Color burn
- Linear burn
- Color Dodge
- Linear dodge (add)
- Vivid light
- Linear light
- Hard Mix
- Difference
Selecting any of these blending modes in Photoshop shows that the Opacity and Fill functions behave differently. When you adjust the fill values, the effects on the image will vary.
Distinction between Opacity and Photoshop Fill
The main distinction between Opacity and Fill is related to Photoshop’s layer styles. If you haven’t applied any effects (styles) to your layer, such as a stroke, drop shadow, bevel or outer glow, reducing the Opacity or Fill values will produce the same consequences. However, if one or more layer styles from eight special blend modes are applied, Opacity and Fill act differently.
To add a stroke, go to the Layers panel and right-click on the layer to which the style will be applied. Then, under Blending Options, select Stroke.
Now, choose a stroke size and color for your Stroke.
We put a layer style to it and are now testing the functionality of both choices, Opacity and Fill.
Applying Opacity
As you can see, lowering the Opacity of the layer lowers the Opacity of the entire layer and its styles.
The Stroke has faded along with the remainder of the text. The entire layer has been rendered invisible with an opacity of 0%, as have the styles applied to it, such as the shadow and the Stroke.
Applying Fill
By comparison, this is the effect obtained by lowering the Fill of the layer:
Hopefully, you can see that changing the values of these variables has quite distinct impacts when applied to a layer with styles applied to it.
The layer’s contents and styles are completely visible at 100%. By lowering the Opacity to 50%, you will note that although the substance of the layer (the text) becomes more transparent, the transparency of the aesthetic components (the Stroke) remains constant.
The key difference between Opacity and Fill in Photoshop is that Opacity affects the entire layer, including its contents, blending modes, and layer styles. In contrast, Fill affects only the transparency of the layer’s content, excluding layer styles and blending modes.